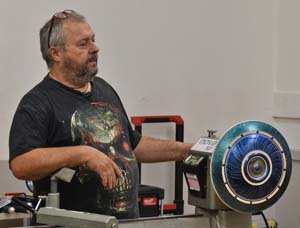
Ryedale Woodturners Club Demonstration

Mick Hanbury, Registered Professional Woodturner


Mick Hanbury

Thursday 6 July 2023

Snainton Village Hall

We welcomed back Mick Hanbury after a five-year absence, caused by the interruption to normal service during and after Covid.

Mick chose to show us how to make and decorate a shield, incorporating a little of something for everyone. It started with a request from a grandchild for a shield for a school re-enactment, and has developed into a wall art project. Essentially an upside down shallow bowl.

Mick was kind enough to allow us to put a recording of his demonstration on YouTube, accessible through our video gallery or from the link here.


Turned wooden shield

Coloured shield

Mick set up a 14 inch sycamore blank held on a screw chuck. He pulled up the tailstock centre to give added security. Mick sources his own timber together with a tree surgeon friend, and would buy a whole tree and put it through their shared wood miser, then kiln dry it.
Sorby Excelsior bowl gouge
Mick used a swept back bowl gouge to shape the bank. This was from the Sorby "gold" Excelsior range, a plasma bonded titanium nitride (TiN) coating over high speed steel. The black mark shows the effect on the chisel of a patch of silica in the blank - blunting it and creating heat. This range is triple the normal price - Mick uses them because working for Turner's Retreat means he got some given for free. The blade is in a Simon Hope handle.
Tool presentation
The blank was shaped using a swept back ½" bowl gouge, which can remove large quantities of material in a short period of time. The correct presentation of the tool will reduce the chance of it skidding across the blank. The long handle allows the butt to be wedged against the hip - put it where your money is.
Three cornered bowl
A 90 mm recess was cut for holding the blank when reversed. The reverse was hollowed out, then did a couple of finishing cuts with a smaller gouge - resulting in tell-tale finer shavings. These are the ones you would use for burnishing should you wish to do that.
Texturing
The speed was slowed to around 500 - 700, and the rear of the shield was then textured using a Sorby texturing tool, as much to show the techniques involved as it was to create an essential design detail. Mick did some floral patterns and a wide band of a "running pattern", best seen with the close ups on the video (around 39 minutes in).
Shield centre
The shield was once again reversed, held on the recess that had been created on the reverse side. Some detail was now added to the centre of the shield. A beeswax and liquid paraffin mix (approximately 20% / 80%) was then applied to the surface and sanded using a hand held sanding arbor. This fills the pores and creates a glass-like surface ready for acrylic spray to be applied. The paste keeps down the dust, and it doesn't conflict with acrylic, as plenty of wood is revealed during the sanding process to give a grip.
Drying acrylic paint
Ebonising lacquer was sprayed over the shield. A little at a time and from a distance - too much and too close will create blobs. In the workshop Mick would leave this for 20 minutes or more, but for the demo he rigged up his patent tool-rest hairdryer holding jig and let the shield spin and dry for a minute or two.
Brushing on acrylic paint
While the background dried, Mick asked for three colours to be nominated. Gold, turquoise and violet were chosen. He curiously couldn't find violet, so went with green. A little of each was squeezed into three throwaway plastic shot glasses, some flow medium was added, and the colours were brushed on to the shield. These were all Jo Sonja iridescent acrylic paints. There is about 15 - 20 minutes to play around with designs before the paint dries.
Iridescent paint
Having tried a few brush patterns, Mick used his finger to create a spiralled effect around the middle section of the shield while stationary. In the central hub he created a spiral with the shield turning slowly. He then created an interference pattern through this using the toe-end of his paint brush. Very effective. The outer green section he stippled with the paint brush, or at least patted it with the side of the brush. He graded the blue and green together during this process.
Cutting back paint
Once the paint had dried sufficiently, Mick sprayed it with melamine gloss lacquer, dried it, then cut an angle on the edge to create a sharp border to the paint, then cleaned away the paint from the inner beads with a small bowl gouge to reveal the sycamore underneath, showing that it was a piece of wood we were looking at, not just paint. Great care taken here, to create very crisp edges. To finish, he textured these beads very lightly with the big Sorby texturing tool used previously on the rear.
Upholstery tack decoration
The lathe indexing system was used to position the shield for 24 indents, made with an impact centre punch (a "centre-pop"). He then tapped in upholstery nails to 12 of these indents with a panel pin hammer. He had been careful to leave enough thickness in the shield to avoid the points of the nails breaking through the back.

Mick's exhibits on show, plus some club items

Turned wooden shield
Turned wooden shields
Burnishing shavings
Blocks for Chairman's challenge
Chairman's pieces